

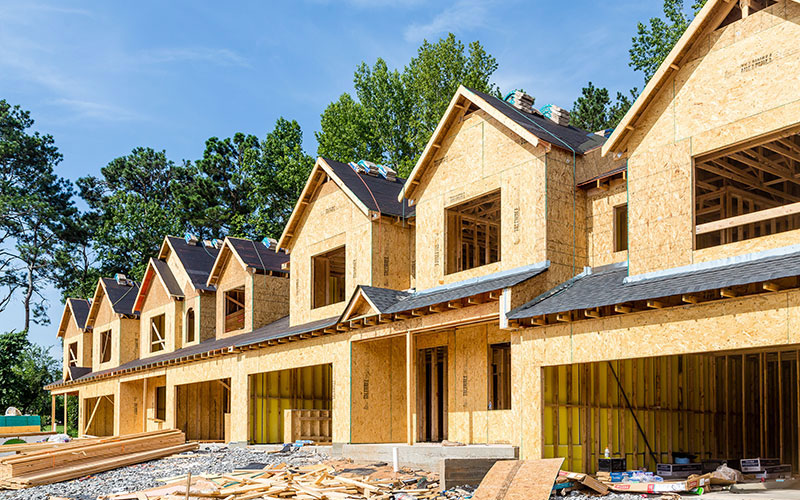
Permits are issued, the contract is signed, the loan is funded. Now construction begins. The next 10–24 months are when the home actually gets built, and what you do during this period matters as much as the decisions that came before it. Each phase has its own pace, decisions, inspection requirements, and ways the project can go right or wrong.
This guide walks through the construction phase of new residential home building from the homeowner’s perspective: what you’ll see, what decisions you’ll face, what’s normal, and what to ask about. For broader pre-construction context (lot selection, design, permitting), see our cost to build a custom home guide, and for the full homeowner journey including pre-construction decisions, see our custom home builder service page.
The eight construction phases
| Phase | Typical duration | What’s happening |
|---|---|---|
| 1. Site prep and foundation | 2–4 weeks | Clearing, grading, excavation, foundation work, first inspections |
| 2. Framing and rough enclosure | 4–8 weeks | Structural framing, sheathing, weather barrier, windows installed |
| 3. Roof and exterior shell | 2–4 weeks | Roofing, exterior cladding underlayment, weather-tight enclosure |
| 4. MEP rough-in | 3–6 weeks | Plumbing, electrical, HVAC rough-in inside walls |
| 5. Insulation and drywall | 2–4 weeks | Insulation, vapor barriers, drywall, finishing |
| 6. Interior finishes | 8–16 weeks | Flooring, cabinets, counters, tile, trim, paint, fixtures |
| 7. Exterior finishes and site work | 2–4 weeks (parallel to phase 6) | Siding, paint, driveway, landscape, hardscape |
| 8. Final inspections and closeout | 2–4 weeks | Final inspections, HERS testing, certificate of occupancy, punch list |
Total active construction time: typically 10–14 months for mid-market custom, 14–20 months for luxury custom, 20–30 months for ultra-luxury or complex sites.
Add 60–120 days for Coastal Commission review if your project triggered CDP review. Weather, trade availability, and material lead times can extend any phase.
Phase 1: Site prep and foundation
The first phase clears the lot and gets the foundation in the ground. From the street it doesn’t look like much for the first few weeks, then suddenly there’s a foundation.
What happens: Demolition of any existing structures, clearing trees and vegetation, rough grading to working elevation, excavation for foundation, forming and pouring footings, forming stem walls or slab perimeter, installing rebar, scheduling first rebar inspection, pouring foundation concrete, allowing cure time, and finally backfilling around the foundation.
Inspections during this phase: Rebar inspection before concrete pour. Post-tension cable inspection if post-tensioned slab. Special inspections for hillside or bluff foundations.
What you’ll see: A lot of dirt moving and concrete trucks. Workers and inspectors on site daily. Heavy equipment.
Decisions you face: Final foundation elevation (especially important for view-corridor preservation), confirmed staking of the home’s actual location on the lot, any last opportunities to adjust footprint position before concrete is poured.
What to ask about: Whether soil conditions matched the geotechnical report, any over-excavation required, whether the foundation grade is final or if landscape grading is still to come, plan for protecting the foundation during weather events before framing starts.
Coastal North County notes: Site access constraints matter heavily here. Narrow streets, sloped driveways, and HOA hours-of-work restrictions can all extend the duration of this phase. Special inspections for hillside or bluff sites add days and require coordination with the geotechnical engineer.
Phase 2: Framing and rough enclosure
The home goes from foundation to recognizable structure during this phase. This is where the project starts feeling real.
What happens: Floor systems framed, wall framing erected, roof framing in place, sheathing applied to exterior walls and roof, weather barrier (Tyvek or equivalent) installed over sheathing, windows installed, exterior doors hung. The home is now an enclosed structure with openings.
Inspections during this phase: Framing inspection before the structure is closed up with sheathing. In California, this typically includes structural connector inspection (Simpson Strong-Tie components verified per plan).
What you’ll see: Lumber stacked on site. Walls going up day by day. The home’s actual size and layout becoming visible. Workers on the roof. Eventually windows being installed.
Decisions you face: Final confirmation of window types and placements (some changes still possible but increasingly expensive). Confirmation of any architectural element that affects framing (built-in niches, structural openings for future built-ins, blocking for wall-mounted features). Last opportunity to easily move walls or change ceiling heights.
What to ask about: Whether framing matches plans exactly or if any field adjustments were made and why. Status of structural shear panels and connectors. Quality of the weather barrier and window installation. Any plumbing or electrical pre-routing needs that should be addressed before walls close up.
Coastal North County notes: Salt air during this phase can affect any exposed metal connectors and fasteners. Quality builders use coastal-rated hardware throughout. Verify with your contractor.
Phase 3: Roof and exterior shell
The home gets weather-tight. This phase makes the difference between a structure exposed to the elements and one ready for interior work.
What happens: Roof underlayment installed, roofing material (tile, metal, composition, or other) installed, flashing and waterproofing at all penetrations, gutters and downspouts roughed in. Exterior cladding (siding, stucco scratch coat, stone, brick) underway. Exterior trim work begins.
Inspections during this phase: Roof inspection in some jurisdictions before underlayment is covered. Exterior weather-barrier verification.
What you’ll see: The roof going on. Scaffolding around the exterior. Stucco or siding workers. The home starting to look like a home from the street.
Decisions you face: Final confirmation of roof and exterior material colors (samples in actual sunlight matter; what looks one color in the design studio looks different on the actual roof). Trim profile selections. Exterior light fixture placements.
What to ask about: Quality of flashing at roof penetrations and wall intersections, quality of stucco lath and weather barrier prep if stucco, status of any exterior architectural features (corbels, brackets, decorative metals).
Coastal North County notes: This is the phase where coastal-rated materials show up most visibly. Salt-air-rated fasteners, coastal-grade flashing, marine-grade hardware on exterior features. Specifying these matters; verify they’re being installed.
Phase 4: MEP rough-in
The home’s nervous system goes in. Plumbing, electrical, and HVAC all get rough-installed inside the walls before drywall closes everything up.
What happens: Plumbing supply and waste lines installed, plumbing fixtures roughed in at vanities, tubs, showers, toilets, washing machines. Electrical boxes installed at every outlet, switch, and fixture location. Wiring pulled through walls. HVAC ductwork installed, equipment positioned, refrigerant lines run. Low-voltage wiring (data, security, AV, smart-home infrastructure) pulled.
Inspections during this phase: Plumbing rough inspection. Electrical rough inspection. HVAC inspection. In some jurisdictions, a combined rough-in inspection covers all three.
What you’ll see: Multiple trades on site, often simultaneously. Lots of small boxes mounted on studs. Pipe and duct running through framing. Activity that may look chaotic but is actually carefully sequenced.
Decisions you face: This is the last easy window to add outlets, light fixtures, or low-voltage drops. Future-proofing decisions (extra circuits for future EV chargers, smart-home infrastructure, AV equipment) need to be confirmed before walls close. Position of any features that need blocking in the walls (TV mounts, grab bars, heavy art).
What to ask about: Plan-vs-installed deviations (sometimes plumbing or electrical can’t go exactly where planned due to structural conflicts; verify these are being managed). Status of any specialty rough-ins like steam shower, radiant heat, or water filtration. Future-flexibility infrastructure being installed.
Coastal North County notes: Title 24 compliance starts being inspected at this phase. HERS rater testing happens during and after MEP rough-in. Verify HVAC sizing matches actual code requirements rather than rule-of-thumb.
Phase 5: Insulation and drywall
The walls go from frame-and-wire to finished surfaces. The home starts feeling like rooms instead of a frame.
What happens: Insulation installed (per Title 24 requirements, typically R-15 walls and R-30 ceiling minimum in coastal North County climate zone 7). Vapor barriers in appropriate locations. Drywall hung throughout. Drywall taped, mudded, sanded to finished level. Primer coat applied.
Inspections during this phase: Insulation inspection before drywall covers it. Some jurisdictions require fire-blocking inspection. HERS rater verification of insulation compliance.
What you’ll see: Walls and ceilings closing up. Rooms taking final shape. White primer everywhere. The home transitioning from construction site to nearly habitable space.
Decisions you face: This is essentially the last chance to make any changes that affect anything behind drywall. After this phase, changes that touch concealed systems require opening walls and become significantly more expensive.
What to ask about: Insulation R-values match plan. Quality of drywall finish level (Level 4 standard for paint, Level 5 for raking light areas like long walls and ceilings with light wash). Any drywall transitions that need special detailing (reveal joints, soffits, archways).
Coastal North County notes: Insulation specification is heavily Title 24-driven in California. Verify continuous insulation outboard of framing if specified (eliminates thermal bridging). HERS rater testing at this stage often catches insulation gaps that need correction before drywall closes.
Phase 6: Interior finishes
This is the longest phase and where most of the home’s character finally appears. Flooring, cabinets, counters, tile, paint, and trim all come together.
What happens: Interior trim and doors installed. Cabinet installation (kitchen, baths, built-ins). Counter templating, fabrication, and installation. Tile work in bathrooms and any tile floors. Hardwood, LVP, or other flooring installation. Interior paint (full painting cycle, not just primer). Lighting fixtures installed. Plumbing fixtures installed. Mirrors, shower doors, and final hardware.
Inspections during this phase: Plumbing trim inspection. Electrical trim inspection. Various final-phase inspections as work completes.
What you’ll see: Major activity for 2–4 months. Multiple trades coordinating. The home transforms from white-primed rooms to finished spaces over this period.
Decisions you face: Most selections should be locked before this phase. Mid-phase decisions are still possible but expensive (material lead times can hold up entire construction if late selections are made). Verifying installations match selections is your main job during this phase: cabinets installed correctly, counter cutouts in right places, tile patterns matching selected design, paint colors matching samples.
What to ask about: Quality of cabinet installation (level, plumb, scribing to walls). Quality of tile work (grout consistency, transitions at edges). Paint quality (proper sheen levels, color match across walls). Plumbing fixture installation quality.
Coastal North County notes: Material lead times for custom millwork (often 16–24 weeks), specialty tile (8–16 weeks), and custom plumbing fixtures (often 8–20 weeks) can extend this phase. Order long-lead items well before this phase to avoid construction-time disruption.
Phase 7: Exterior finishes and site work
Often runs parallel to the interior finishes phase, with separate crews. This phase brings the home’s exterior and outdoor spaces together.
What happens: Exterior paint (color and texture). Driveway and walkway hardscape. Landscape grading and irrigation. Plant installation. Pool and spa construction if scope. Outdoor kitchen and built-in features. Final exterior light fixtures. Fencing and gates.
Inspections during this phase: Final exterior grading inspection. Pool inspection if applicable.
What you’ll see: Site transformation. The home’s curb appeal emerging.
Decisions you face: Last opportunities for landscape adjustments. Confirmation of pool tile, water feature design, outdoor kitchen layouts. Hardscape pattern and material confirmation.
What to ask about: Drainage and grading away from the home (critical for foundation longevity). Plant maturity and warranty if applicable. Irrigation zoning and controller setup.
Coastal North County notes: Drought-tolerant and native plant palettes specified at the design phase show up here. HOA Art Jury approval for visible exterior elements (mailbox, address numbers, exterior light fixtures) verified before installation. Coastal Development Permit conditions (if any) verified during installation.
Phase 8: Final inspections and closeout
The home gets verified for occupancy and turned over to you.
What happens: Final building inspection by city. Final electrical, plumbing, and mechanical inspections. HERS rater final testing and certification. Title 24 compliance documentation. Certificate of Occupancy issued. Walkthrough with the builder. Punch list created and worked. Manuals and warranty documentation compiled.
Inspections during this phase: Final building inspection (city). HERS final testing. Any specialty inspections (pool, solar, etc.).
What you’ll see: Multiple inspectors on site. Builder doing punch-list walks. Manuals being compiled. Cleanup crews. Move-in ready.
Decisions you face: Punch list creation (every item that needs correction before you accept the home). Move-in scheduling. Final payment timing.
What to ask about: Warranty terms and what’s covered for how long. Maintenance schedules for major systems. Operating procedures for specialty equipment (smart-home, HVAC, water systems). Any code-required maintenance (HVAC filter changes, septic if applicable).
Learn More: Steps to Build a Custom Home
Coastal North County construction-phase specifics
Several factors specific to coastal North County significantly affect the construction phase beyond what national guides cover.
- HERS testing throughout construction. California’s Title 24 energy code requires HERS rater testing at multiple points during construction (insulation, duct sealing, equipment commissioning, final). Schedule these carefully; missed HERS testing can hold up plan-check signoff.
- HOA Art Jury verification during exterior phases. Covenant communities (Rancho Santa Fe) require Art Jury verification of installed exterior elements matching approved plans. If anything was changed during construction (color, material, fixture style), Art Jury can require remediation.
- Coastal Commission compliance verification. Projects with Coastal Development Permit conditions may require condition compliance verification during construction. Setback verification, drainage compliance, plant palette compliance are all common requirements.
- Salt air during exterior phases. Coastal exposure during phases 2–3 (when the structure is partially weatherized but not fully enclosed) requires special attention to corrosion protection. Coastal-rated fasteners, properly applied weather barriers, and care with exposed metal all matter.
- Trade availability. Coastal North County trade availability has been tighter than usual through 2026. HVAC, plumbing, and electrical trades are especially constrained. Skilled finish carpenters and tile installers similarly tight. Building managers who manage trade scheduling well will make a major difference in keeping projects on track.
- Material lead times. Custom cabinets (16–24 weeks), specialty tile (8–16 weeks), custom plumbing fixtures (8–20 weeks), custom millwork (12–20 weeks), specialty stone (12–16 weeks). Late selections push the timeline at the trades that depend on them.
How to stay engaged without becoming a problem
Custom builds work best when homeowners stay informed and engaged but don’t try to manage the project themselves. Some practical guidance:
- Weekly site walks with your builder. Once construction begins, set up a regular weekly meeting on site. Ask questions, photograph progress, and raise concerns through your builder rather than directly to trades on site.
- Trust the inspection process. City and HERS inspections exist to verify quality. If you have specific concerns, raise them with your builder before or after inspections rather than during.
- Document everything in writing. Selections, changes, decisions, scope adjustments. Verbal agreements at site walks create disputes later. Every change goes through written change orders with cost and schedule impact.
- Don’t direct trades. Communicate with the builder, not directly with subcontractors. Direct homeowner instruction to subs creates coordination problems and contract complications.
- Be available for time-critical decisions. Some decisions need to happen quickly to keep the project moving. Be available by phone or text for selection questions during business hours.
- Plan major life events around the project. Family travel, work demands, and other commitments should account for the construction schedule. Major life disruptions during construction are when things go wrong.
Learn More: Best Ways to Save Money When Building a House
Frequently asked questions
How long does the construction phase of a new home take?
Total active construction typically runs 10–14 months for mid-market custom, 14–20 months for luxury custom, 20–30 months for ultra-luxury or complex sites.
The phases break down as: site prep and foundation 2–4 weeks, framing 4–8 weeks, exterior shell 2–4 weeks, MEP rough-in 3–6 weeks, insulation and drywall 2–4 weeks, interior finishes 8–16 weeks, exterior finishes (parallel) 2–4 weeks, closeout 2–4 weeks.
Can I make changes during construction?
Yes, but the cost and feasibility depend on the phase. Changes during phases 1–3 are typically possible at modest cost. Changes during phases 4–5 require opening walls and become significantly more expensive. Changes during phases 6–7 are limited to surface and finish modifications. After the certificate of occupancy, changes become full renovation projects.
What inspections happen during new home construction?
Foundation rebar inspection, framing inspection, plumbing rough, electrical rough, HVAC rough, insulation inspection, drywall (in some jurisdictions), exterior weather barrier, plumbing trim, electrical trim, HVAC trim, fire safety, HERS testing at multiple points, and final building inspection for Certificate of Occupancy. California adds Title 24 HERS rater testing throughout construction.
What can delay my new home construction?
Weather delays (mostly during exterior phases). Material lead times for custom selections that weren’t ordered early enough. Trade availability tightness in coastal North County through 2026. Discovered conditions like soil issues or hidden site complications.
Plan-check revisions if structural or systems plans need adjustment. HOA approval timelines for Covenant communities. Coastal Commission inspections for CDP-conditioned projects.
How often should I visit the construction site?
Weekly site walks with your builder are typical and useful. Avoid site visits without the builder unless arrangements have been made. Don’t visit during active work without coordination because of liability and disruption issues. Document each visit with photos and any decisions made.
What’s the most important phase to pay attention to?
Phase 1 (foundation) for confirming final placement and elevation. Phase 4 (MEP rough-in) for confirming all your future-flexibility infrastructure is being installed. Phase 5 (insulation and drywall) because this is the last easy window for any change that touches walls. Phase 8 (closeout) for creating a thorough punch list before accepting the home.
What’s a punch list?
A list of items that need correction or completion before you accept the home and make final payment. Includes items like paint touchups, minor adjustments to doors and drawers, fixture corrections, and any items not fully complete at substantial completion.
The builder works the punch list until items are resolved, then you do a final walkthrough and accept the home.
When does my warranty start?
Typically, at the certificate of occupancy or move-in date (depending on the builder). Most California custom home builders provide a 1-year general warranty, 2-year systems warranty (electrical, plumbing, HVAC), and 10-year structural warranty. Specific terms vary by builder; review your warranty documents carefully and keep them with your home records.